Changing the front bulbs
Front fog lamps/cornering lamps with fog lamp function
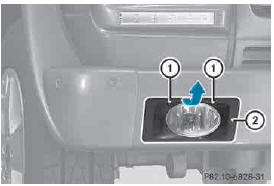
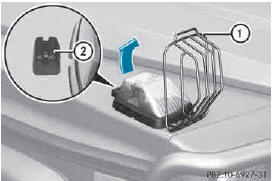
► Switch off the lights.
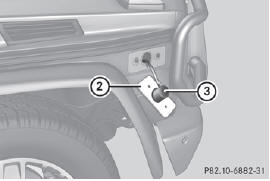
► Unscrew screws 1.
► Remove cover 2.
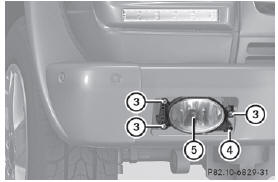
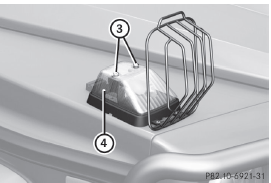
► Unscrew screws 3.
Only remove screws 3. Do not turn adjustment screw 4. If adjustment screw 4 has been turned, the front fog lamp adjustment must be checked at a qualified workshop.
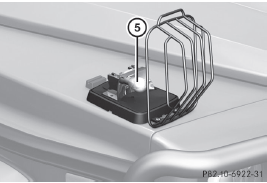
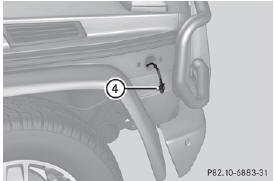
► Remove lamp 5.
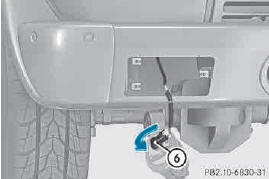
► Hold lamp 5.
► Lightly press bulb holder 6, turn it counter-clockwise to the stop and pull it out.
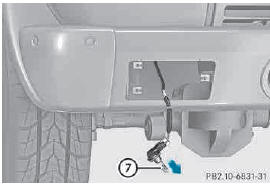
► Take bulb 7 out of bulb holder 6.
► Insert the new bulb into bulb holder 6.
► Insert bulb holder 6 into lamp A and turn it clockwise to the stop.
► Insert lamp 5.
► Replace and tighten screws 4.
► Position cover 2.
► Replace and tighten screws 1.
Turn signals
Make sure that the protective grille does not hit any painted surfaces.
You could otherwise damage the paintwork.
Do not fasten the screws too tightly. You could otherwise damage the lens.
Turn signal lamp with protection grille (AMG vehicles)
► Switch off the lights.
► AMG vehicles: pull protection grille 1 in the direction of the arrow out of mounting 2.
► Fold up protection grille 1.
Example: turn signal lamp
► Switch off the lights.
► Unscrew screws 3.
► Remove lens 4.
Example: turn signal lamp
► Turn bulb A counter-clockwise, applying slight pressure, and remove it from the bulb holder.
► Insert the new bulb into the bulb holder and turn it clockwise until it engages.
► Install lens 4.
► Replace and tighten screws 5.
► AMG vehicles: fold down protection grille 1 and allow it to engage in mounting 2.
Side marker lamps
Do not fasten the screws too tightly. You could otherwise damage the lens.
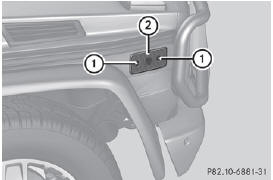
Front side marker lamp (example)
The bulbs of the front and rear side marker lamps are changed in the same way.
► Switch off the lights.
► Unscrew screws 1.
► Remove housing 2.
► Remove dust cover 3.
► Push the catch to the side and pull the bulb holder with the bulb out of housing 2.
► Lightly press bulb 4, turn it counterclockwise and pull it out.
► Insert the new bulb and, applying slight pressure, turn it clockwise until it engages.> X Insert the bulb holder into housing 2.> X Attach dust cover 3.> X Insert housing 2.> X Replace and tighten screws 3.
See also:
ESP® (Electronic Stability Program)
Important safety notes
Observe the "Important safety notes"
section .
WARNING
If ESP® is malfunctioning, ESP® is unable to
stabilize the vehicle. Additionally, further
driving safety s ...
Qualified specialist workshop
An authorized Mercedes-Benz Center is a
qualified specialist workshop. It has the
necessary specialist knowledge, tools and
qualifications to correctly carry out the work
required on your vehicle. ...
PRE-SAFE® (anticipatory occupant
protection system)
WARNING
The PRE-SAFE® system reduces the impact of
an accident on vehicle occupants, as long as
their seat belts have been fastened correctly.
Although your vehicle is equipped with a PRESAFE
® ...